Recipes
Each recipe is a list of steps you can follow in Figma, with the layers you should end up with and the result on the canvas. They assume a flowed document already exists; see Using the plugin for Flow itself.
Where things are
| You want to | Go to |
|---|---|
| Flow a source frame, or reflow a document | Flow tab |
| Give the first page a cover, or left and right pages their own templates | Pages tab, the four rules at the top |
| Give one page a template of its own, insert or remove a page by hand | Pages tab, below the thumbnails |
| Rebuild a contents block after restyling its rows | Pages tab, the Contents button at the bottom |
| Paste a document or open a file, or add a document to one you already have | Import tab |
| Make a PDF | Export tab |
| Change how splitting, keep-with-next and page layout behave | Rules tab |
A cover page
A cover is a template with no content area. A page made from it holds no flowed text, so the text starts on the next page, and the page is never removed as empty.
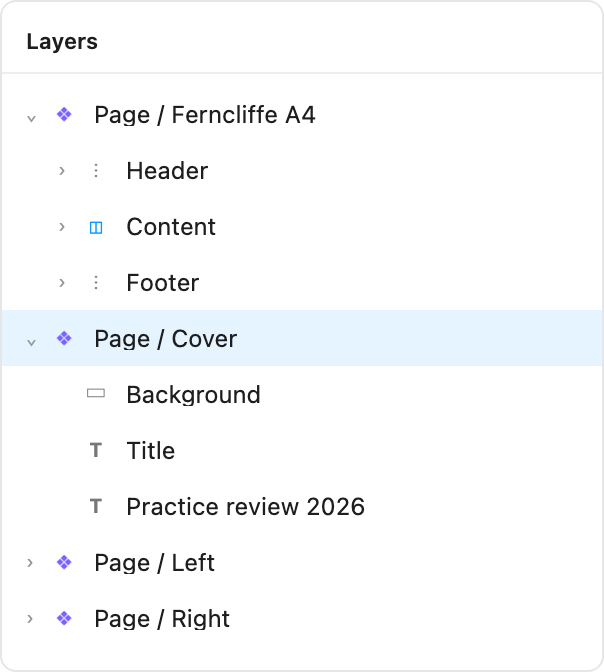
- On the same Figma page as your main template, make a second component at the same page size and name it "Page / Cover". Put the cover on it: a background, the title, a logo, a date. Give it no Slot and no frame named "Content".
- Select any page of your flowed document and open the Pages tab. The strip shows your pages.
- Under "First page", choose "Page / Cover (static, no content area)".
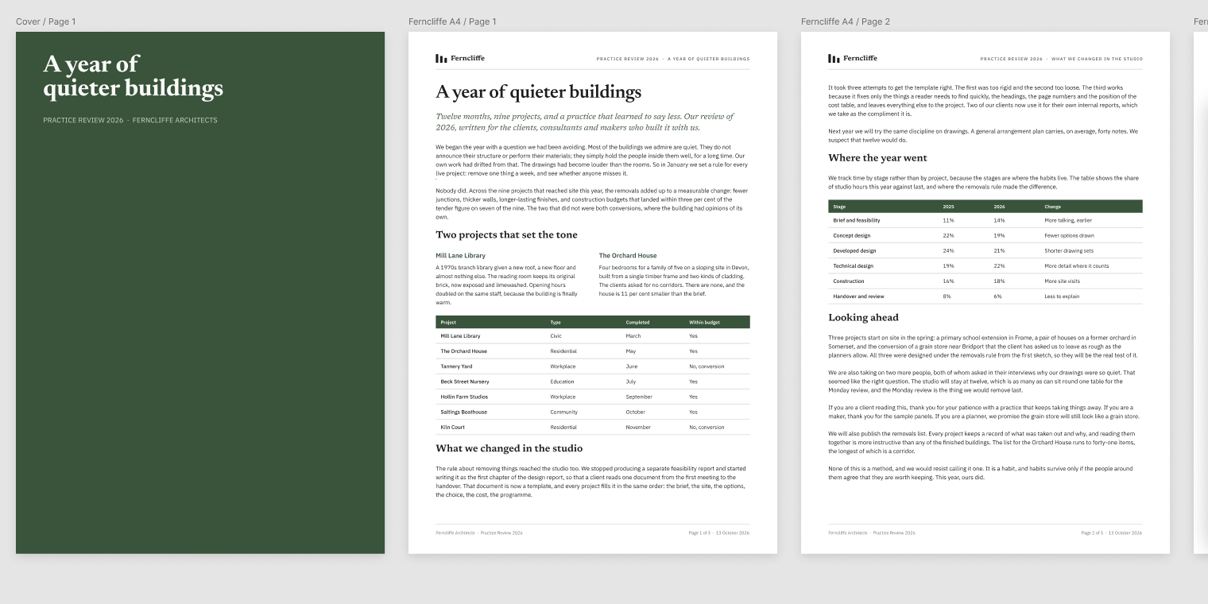
- Press "Apply and reflow". Page 1 is rebuilt from the cover template, the text now starts on page 2, every page is renumbered, and the strip shows the cover as page 1 marked "(static)".
Left and right pages
- Duplicate your main template twice and name the copies "Page / Left" and "Page / Right".
- Mirror the margins. On "Page / Left" set the page padding to, say, 24 on the left and 64 on the right; on "Page / Right" the other way round. Move the page number to the outer edge on each.
- Open the Pages tab. Set "Left pages" to "Page / Left" and "Right pages" to "Page / Right". Leave "Other pages" as it is; it only applies where the other rules do not.
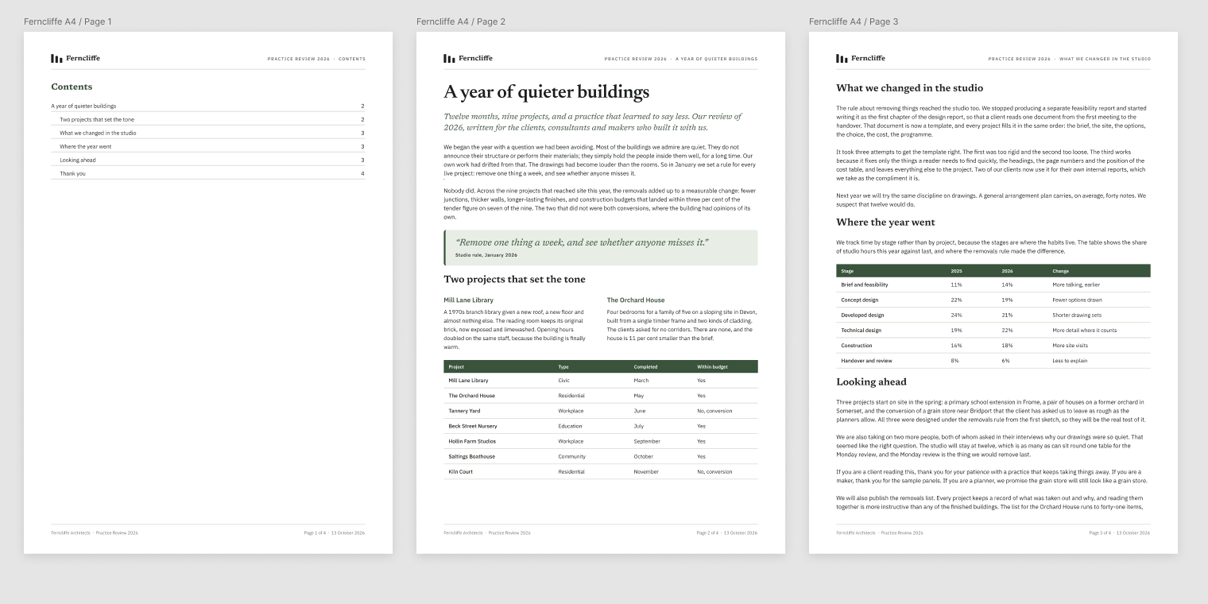
- Press "Apply and reflow". Page 1 is a right-hand page, as in print. With a cover, the cover is page 1 and the text starts on page 2, a left-hand page.
- To see the pairs as pairs, open the Rules tab and set "Lay pages out" to "In spreads": page 1 sits alone on the right, then left and right pages side by side.
"Selected page" under the strip overrides the rules for one page: click a thumbnail, pick a template, Apply. Use it for a full-page figure or a page that needs its own layout.
A table of contents
A contents block is a frame named with [toc] that Pagestream fills with one row per heading. You design the row once; the plugin copies it.
- In your source frame, before the first heading (or on page 1 of a flowed document, at the top of the content area), add a frame. Set it to vertical auto layout, width Fill, and name it "Contents [toc:2]". The number is the deepest heading level listed; "[toc]" alone lists every level.
- Inside it, add one row: a frame with horizontal auto layout, width Fill, and "space between" so the number sits at the right. Put two text layers in it, named "Title" and "Page". Style them. Add a bottom border to the row if you want rules, or a dotted line layer between the texts for a leader. Name the row "Row 1".
- Optional: duplicate the row, name the copy "Row 2", and give it a smaller font and some left padding. It will be used for level-2 headings. "Row 3" works the same. If you make only one row, deeper levels get 14 px more indent per level.
- If you want a heading above the list, add a text layer named "Contents" (not "H2 Contents"): a name that starts with H would be listed as an entry itself.
- Press Flow, or Reflow if the document already exists. The rows appear, one per heading, each a copy of the template row for its level, with the page number on the right. Your template rows are hidden (the grey eye in Layers) and stay inside the block; do not delete them.
- The numbers follow every edit from then on. An ordinary pass only updates the text of existing rows.
- To restyle later: edit the hidden "Row 1" or "Row 2" (select it in Layers; you can turn it visible while you work, the plugin hides it again), then open the Pages tab and press "Rebuild contents from its template rows". The rows are made again from your templates.
![Layers of a source frame: a Contents [toc:2] block holding Row 1 and Row 2, each with Title and Page text layers, followed by the headings and paragraphs](/media/fig-layers-toc-before.png)
![Layers of page 1 after Flow: the contents block, named with [toc:2] and [page-break], holds the hidden template rows and one generated row per heading](/media/fig-layers-toc.png)
Two columns
Columns live in the template. The content area becomes a row of column frames, and the text flows through them in order: down column 1, into column 2, then on to the next page.
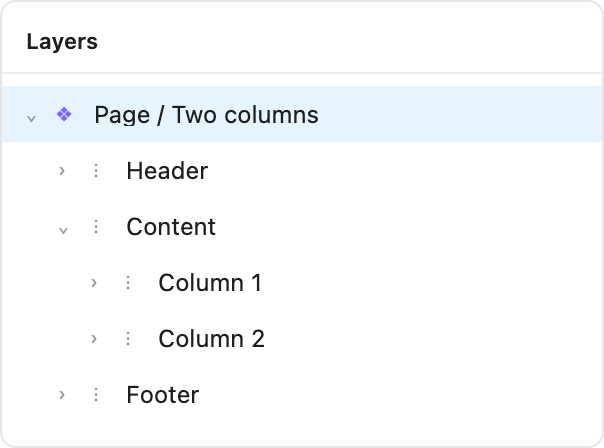
- Open your main template component. If its content area is a Slot, replace it with a plain frame named "Content" of the same size and position; a frame is easier to work with for columns.
- Set the Content frame to horizontal auto layout with the gutter as its gap, say 20. Keep its width and height as they were (Fill between header and footer).
- Inside it, add two frames named "Column 1" and "Column 2". Make each a vertical auto layout, width Fill, height Fill. Leave them empty.
- Make sure your source blocks suit a column: a source frame as wide as one column is easiest. Imported documents are made at the first column's width automatically. A table with fixed cell widths designed for the full page does not shrink gracefully; give it column-sized cells.
- Press Flow (or Reflow on an existing document). Column 1 fills first, then column 2, then the next page. Headings keep with their text, paragraphs split between lines and tables between rows, across columns as across pages.
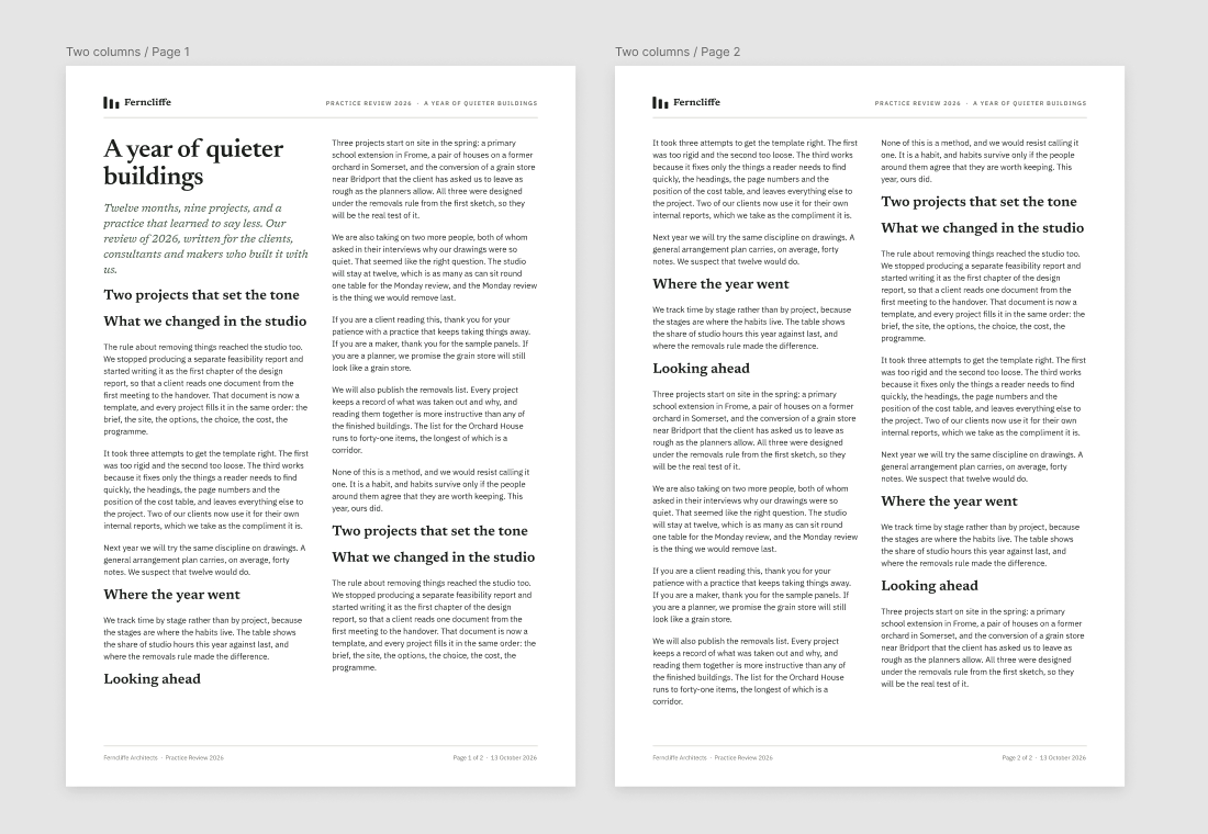
Three columns are three frames. The last page is not balanced: its first column fills before its second.
A page break
- Add an empty frame to the source frame, or to any page, between the two blocks you want to separate. Make it 1 px tall with no fill, so it takes no space, and name it "[page-break]".
- Press Flow or Reflow. Everything after the frame starts on the next page, whatever room was left, and nothing is ever pulled back across it.
- For the next column instead of the next page, name it "[column-break]".
![Layers of a source frame with an empty [page-break] frame between a table and the next heading](/media/fig-layers-break.png)
Page breaks in Word and Google Docs come through the Import tab as [page-break] frames, and a line reading [page-break] on its own in Markdown does the same.
Footnotes
- Open your template and add a frame named "Footnotes" between the content area and the footer: vertical auto layout, width Fill, height Hug, no children. Give it a thin top border if you want a rule.
- In the source frame, right after the paragraph that cites it, add a small frame named "Note 1 [note]": a horizontal auto layout with a text layer for the number and one for the note. Write the number in the paragraph too, at a smaller size.
- Flow. The note lands in the Footnotes frame of the page its paragraph is on; the content area shrinks to make room. From then on it follows the paragraph on every Reflow.
A cross-reference
- Add [#intro] to the layer name of the block you want to point at, for instance "H2 Introduction [#intro]".
- Anywhere in the text, in a block or in the template, write {page:intro}. After Flow it reads as that block's page number and stays right on every Reflow.
Combining the tags
Every rule is a tag in a layer name, and a name can carry more than one. The tags read left to right as plain words, so "Contents [toc:2] [page-break]" means: this is a contents block two levels deep, and the page ends after it.
| Layer name | What happens |
|---|---|
H2 Where the year went | A heading: kept with the block after it, listed in the contents at level 2, used as the running head. |
Projects table [split] | May break between its rows; a first row named Header is repeated. |
Summary card [keep] | Never ends a page, whatever its name. |
Contents [toc:2] [page-break] | The contents list, headings down to level 2, on a page of its own. |
Contents [toc] [column-break] | The contents list in the first column; the text starts in the next column. |
Appendix table [split] [keep] | A table that may split by row and is kept with whatever follows its last part. |
[page-break] | An empty frame: a new page starts after it. |
[column-break] | An empty frame: the next column starts after it. |
Note 3 [note] | A footnote: goes to the Footnotes frame of the page its preceding block is on. |
H2 Introduction [#intro] | A heading that is also the target of every {page:intro} in the document. |